
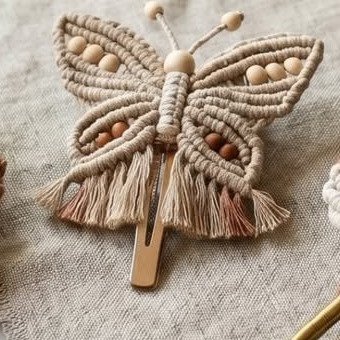
This butterfly hair clip macramé pattern is perfect for makers who love delicate, wearable fiber art. The finished butterfly measures 4 inches wide by 3.5 inches long and features symmetrical wings, a beaded body, and soft ombré fringe in natural, dusty-rose, and caramel tones.
Create a Stunning Butterfly Hair Clip Macramé Pattern in One Weekend
Worked in 3 mm single-strand cotton, this design uses diagonal double half hitch to outline the wings and light alternating square knots for the interior fill. The body is formed by threading graduated wooden beads down a central spine, then locking each with an overhand knot. Meanwhile, two beaded antennae curve upward from the thorax, giving your butterfly a lifelike silhouette.
You can complete this piece in 7 to 10 hours — typically two or three relaxed evening sessions. Because of the detail work and bead placement, the pattern suits confident intermediate makers who are comfortable with double half hitch and shaping curved outlines. However, the illustrated steps break every move into clear visual guides, so you’ll never feel lost.
What’s Inside Your Download
Your download includes a full step-by-step PDF with diagrams for cord layout, knot reference, bead placement, and construction order. In addition, a printable quick-reference card summarizes cord cuts, knot abbreviations, and the six-stage build order. Therefore, you have everything you need to finish a professional, clip-ready butterfly — no guesswork required.