
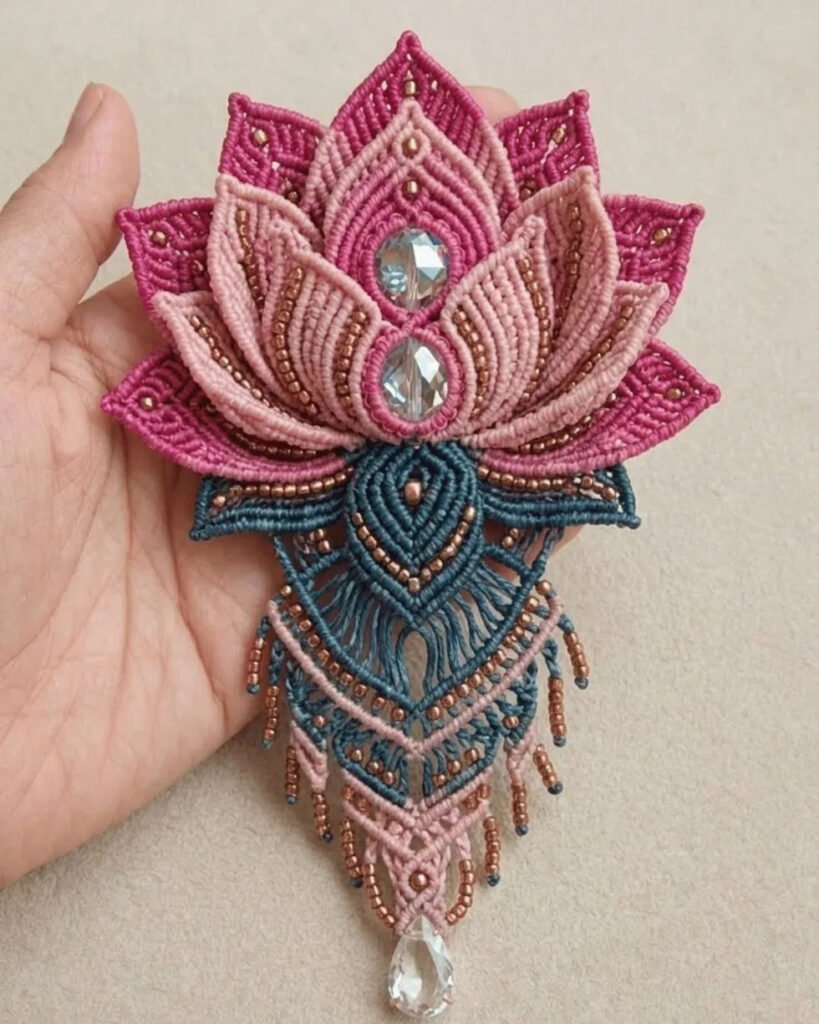
Finished beaded lotus macramé pattern with layered petals and crystal accents

Lotus Patch

Skill levelAdvancedFinished size4.25 x 7 in (11 x 18 cm)Build time12-16 hours / 4-5 evening sessions

This beaded lotus macramé pattern offers advanced micro-macramé crafters a stunning project that combines intricate knotwork, layered petal construction, and sparkling crystal accents. Whether you’re adding a handcrafted patch to a jacket or creating a statement brooch, this design delivers maximum visual impact in a palm-sized finished piece.

Beaded Lotus Macramé Pattern: Intricate Layers and Crystal Details

The pattern features five berry-magenta outer petals formed with picot-point clove hitches, a dusty-rose middle layer with beaded ribs, and a teal peacock-eye body anchored by two faceted crystals. Because each petal is built separately on your board, you can work in stages over several evenings. This structure makes the project manageable despite its complexity.

Build Time and What’s Included

Expect to spend 12–16 hours across 4–5 evening sessions completing this piece. Your download includes a fully illustrated step-by-step PDF with detailed diagrams for every component, plus three technique deep-dives covering picot-point petals, peacock-eye construction, and beaded fringe assembly. In addition, a printable quick-reference card summarizes cord cutting, knot abbreviations, and bead placement for at-a-glance guidance while you work.

Meanwhile, the pattern covers essential troubleshooting tips—for example, how to keep petal points sharp and prevent arc collapse—and offers finishing options for both brooch and pendant conversions. Therefore, even complex micro-macramé becomes accessible when you have clear, comprehensive instructions at your fingertips.

Materials at a glance

  • Waxed polyester cord — berry magenta, 0.8 mm, 38 yd
  • Waxed polyester cord — dusty rose, 0.8 mm, 34 yd
  • Waxed polyester cord — slate teal, 0.8 mm, 30 yd
  • Copper seed beads size 8/0, approx. 220
  • Crystal rondelle beads, clear 14 mm and 10 mm, 1 each
  • Crystal teardrop pendant 18 x 12 mm, 1
  • Brooch pin back or sew-on backing felt, 1

Build order

  1. Cut and organize all cords per the cutting chart
  2. Build 5 outer petals (berry) — picot-point DDHH with beaded midribs
  3. Build 5 middle petals (rose) — same technique, wider V, echo row
  4. Assemble petal rings: outer ring fanned, middle ring layered on top, offset
  5. Knot center medallion (berry) in place over ring bases; thread both crystals
  6. Build peacock-eye body (teal) and stitch under medallion base
  7. Build 3 scallop drop tiers, nest them, add beaded fringe picots
  8. Attach teardrop finial, wrap and weave all back ends, seal, mount pin back or felt

Cord cutting reference

  • A — 5 × 24 in (outer petal holding cords, berry)
  • B — 30 × 32 in (outer petal working cords, berry)
  • C — 5 × 26 in (middle petal holding cords, rose)
  • D — 30 × 30 in (middle petal working cords, rose)
  • E — 6 × 28 in (medallion outline + halo, berry)
  • F — 6 × 26 in (peacock-eye holding cords, teal)
  • G — 16 × 30 in (peacock-eye working cords, teal)
  • H — 14 × 26 in (scallop tier cords, teal)
  • I — 10 × 26 in (scallop tier cords, rose)
  • J — 12 × 18 in (fringe picot + finial pairs, mixed)

Knot abbreviations

  • LHK = Lark's Head Knot
  • HDHH = Horizontal Double Half Hitch
  • DDHH = Diagonal Double Half Hitch
  • VDHH = Vertical Double Half Hitch
  • PIC = Picot Point Turn
  • BD = Bead Thread-On
  • OK = Overhand Knot
  • WRAP = Gathering Wrap

Top 5 mistakes to avoid

  1. Picot loop too big — keep it at 3mm for sharp petal tips
  2. Uneven DDHH tension causes petal curling — steam-block to fix
  3. Bead threaded after the hitch instead of before — always thread then lock
  4. Inner peacock-eye arcs pulled tighter than outer — pin every arc apex first
  5. Scallop tiers stitched under tension causing pucker — tack centers first with piece flat