
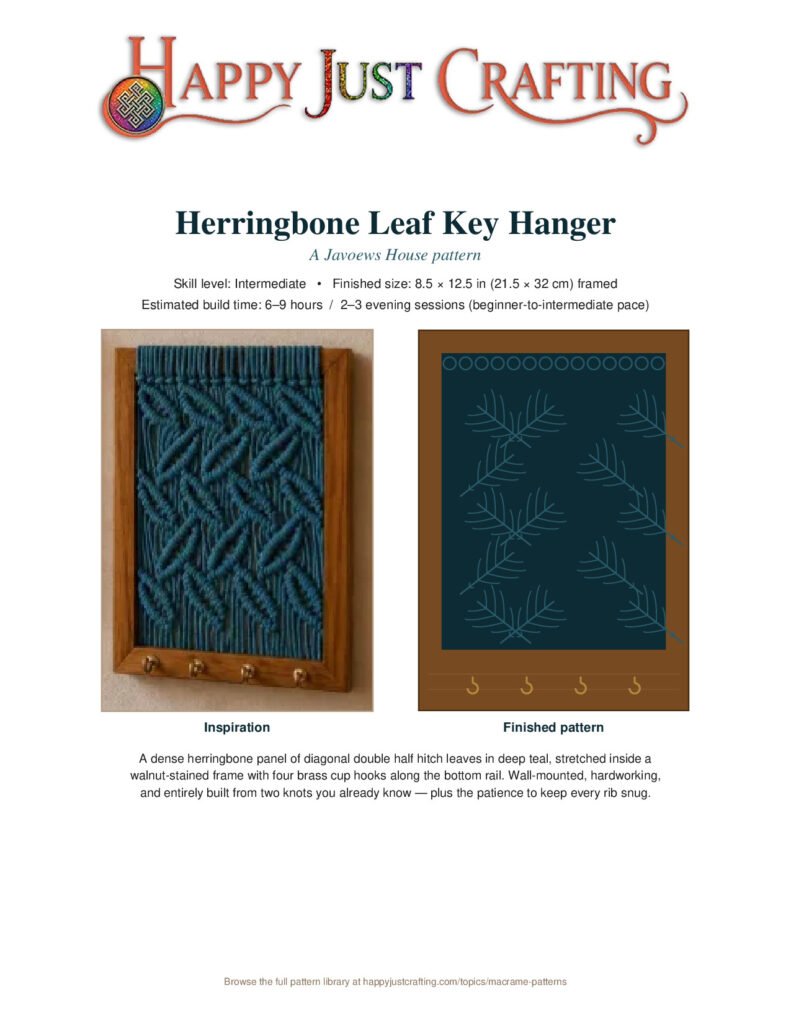
Finished herringbone leaf key hanger macramé pattern in teal inside walnut frame with brass hooks

Key Hanger

Skill levelIntermediateFinished size8.5 × 12.5 in (21.5 × 32 cm) framedBuild time6–9 hours / 2–3 evening sessions

If you’re searching for a herringbone leaf key hanger macramé pattern that blends function and visual impact, this framed teal beauty is for you. The diagonal double half hitch leaves create a dense lattice inside a walnut-stained wooden frame fitted with four brass cup hooks—perfect for entryways, mudrooms, or anywhere keys, leashes, and small bags need a dedicated home.

What Makes This Herringbone Leaf Key Hanger Macramé Pattern Special?

Because it uses only two core knots—lark’s head and double half hitch—intermediate makers who’ve tackled basic wall hangings will feel right at home. However, the staggered five-row lattice demands patience and precision; therefore, every rib must sit snug to produce the signature herringbone look. Expect to spend 6–9 hours across two or three evening sessions.

The finished piece measures 8.5 × 12.5 inches framed. In addition, the download includes a fully illustrated step-by-step PDF and a printable quick-reference card that summarizes cord layout, knot keys, and the build order at a glance. Meanwhile, the pattern walks you through frame prep, mounting eighteen folded cords, working the leaf rows, and installing the panel so the rod stays hidden behind the top rail.

Who Should Make This Pattern?

This design suits makers comfortable with diagonal double half hitching and ready to explore geometric repetition. For example, if you’ve already completed a small feather or chevron piece, the herringbone stagger will feel like a natural next step. So grab deep-teal 3 mm single-twist cotton, a rebated frame, and four brass cup hooks—your keys will thank you.

Materials at a glance

  • 3 mm single-twist cotton, deep teal, 65 m
  • 6 mm hardwood rod × 20 cm
  • 8.5 × 12.5 in rebated wooden frame
  • 3 mm MDF or ply backing board
  • Four 3/4 in brass cup hooks
  • Staples, fabric glue, scissors, comb, pins, drill with 2 mm bit

Build order

  1. Frame prep & marking (confirm rebate depth, mark hook positions)
  2. Mounting band (lark's head + vertical lark's head braid)
  3. Top lock row (HDHH over holding cord B)
  4. Leaf rows 1–5 (staggered diagonal double half hitch leaves)
  5. Base lock row & trim (HDHH over cord C, secure ends)
  6. Frame installation (rod into top rebate, staple panel to bottom)
  7. Hooks & finishing (drill pilots, set hooks, steam and brush)

Cord cutting reference

  • A — 18 × 3.2 m (126 in) = 57.6 m working cords
  • B — 1 × 1.5 m (59 in) top holding cord
  • C — 1 × 1.5 m (59 in) base holding cord
  • D — 1 × 3.2 m (126 in) spare/repair length

Knot abbreviations

  • LH = Lark's Head
  • VLH = Vertical Lark's Head
  • HDHH = Horizontal Double Half Hitch
  • DDHH = Diagonal Double Half Hitch
  • OK = Overhand Knot

Top 5 mistakes to avoid

  1. Leaf ribs show gaps because hitches weren't pushed snug to spine tip
  2. Panel narrows when spines are pulled too tight—hold taut but let hitches set width
  3. Rows drift off horizontal if the top lock row wasn't ruler-checked
  4. Hooks split the bottom rail when pilot holes are skipped
  5. Panel sags after framing if insufficient tension was applied before stapling