
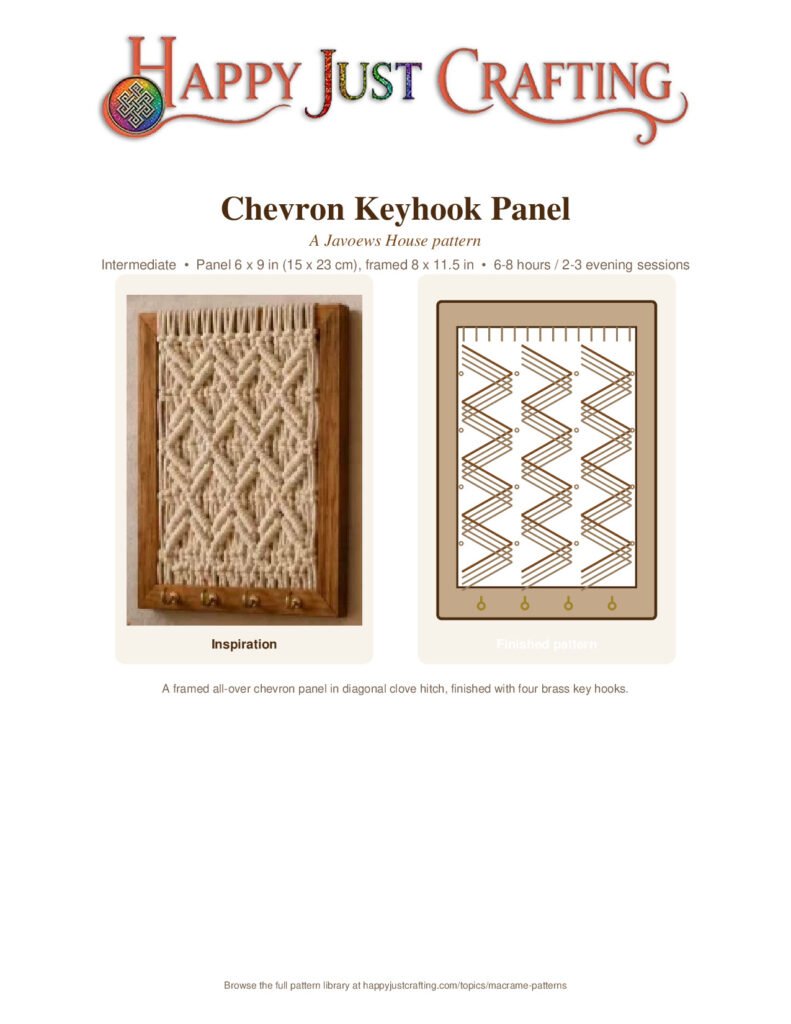
Finished chevron keyhook macramé pattern in walnut frame with brass hooks

Chevron Keyhook

Skill levelIntermediateFinished sizePanel 6 x 9 in (15 x 23 cm), framed 8 x 11.5 inBuild time6-8 hours / 2-3 evening sessions

This chevron keyhook macramé pattern transforms natural cotton cord into a striking framed panel that keeps your keys close and your entryway organized. Whether you’re an intermediate maker looking for an eye-catching weekend project or searching for a functional statement piece, this diagonal clove-hitch design delivers both elegance and utility.

Chevron Keyhook Macramé Pattern Features

The finished panel measures 6 × 9 inches inside an 8 × 11.5-inch walnut frame, featuring four brass hooks along the bottom rail. This chevron keyhook macramé pattern takes approximately 6–8 hours to complete, or about 2–3 relaxed evening sessions. It’s worked entirely in diagonal double half-hitch knots on three independent columns, creating the signature woven zigzag texture that reads as modern yet timeless.

Your download includes a comprehensive illustrated PDF with step-by-step construction diagrams, a full-piece assembly map, three technique deep-dives, and a troubleshooting guide to keep your chevron points level. In addition, you’ll receive a printable quick-reference card with the cord cutting chart and knot key at a glance. Because even spacing is crucial, the pattern emphasizes pinning and checking your work after each repeat—small habits that prevent common lattice-panel pitfalls.

Perfect for Functional Fiber Art

This pattern suits anyone comfortable with basic diagonal clove hitches and ready to practice precision. The project uses roughly 46 yards of 3mm single-twist cotton mounted on a dowel that sits hidden behind the frame’s top rail. Meanwhile, the walnut stain and brass hooks give the finished piece a refined, furniture-quality look that complements modern farmhouse, Scandinavian, or boho interiors. From mounting to framing, every step is clearly mapped so you can work with confidence and achieve professional results.

Materials at a glance

  • 3 mm single-twist cotton cord, natural ecru, ~46 yd (42 m)
  • 1/4 in hardwood dowel, cut 7.5 in
  • 8 x 11.5 in wood frame, walnut stain, 1 in rails
  • 4 brass cup hooks, 3/4 in screw-in
  • 2 small wood screws #4 x 1/2 in (dowel rests)
  • 8–10 staples or tacks, 1/4 in crown
  • 1 small sawtooth hanger

Build order

  1. Cut all cords per chart; mount 16 cords (A-B-A groups) on dowel with Lark's Heads
  2. Top border: one firm HDHH row across all 32 working cords using carrier C
  3. Chevron lattice: work each of 3 columns in DDHH zigzags, 4 full repeats, keeping points level
  4. Bottom border: second HDHH row across all cords using second carrier C
  5. Trim working ends to 2 in, secure each pair with overhand knot on back
  6. Frame: seat dowel on screws, tension panel, staple bottom edge inside rail
  7. Install 4 brass cup hooks on bottom rail; add sawtooth hanger

Cord cutting reference

  • A — 10 × 96 in (Chevron columns, outer 2 columns)
  • B — 6 × 96 in (Chevron column, center)
  • C — 2 × 30 in (Border-row carriers, top + bottom)
  • D — 2 × 60 in (Zigzag carriers, spare)

Knot abbreviations

  • LH = Lark's Head
  • HDHH = Horizontal Double Half Hitch
  • DDHH-R = Diagonal Double Half Hitch (right)
  • DDHH-L = Diagonal Double Half Hitch (left)
  • OK = Overhand Knot

Top 5 mistakes to avoid

  1. Chevron points drift out of line — pin every point and recheck after each repeat
  2. Lattice looks loose or gappy — pull each second hitch up-and-over firmly before next cord
  3. Panel narrows toward bottom — pin carrier end-points at column edge before hitching
  4. Border row waves — re-pin C carrier dead level; ease knots along before tightening
  5. Panel too short for frame — block damp and pin to 9 in; steam lightly through cloth